Friday, October 15, 2010

Heatsink Lapping

Maintaining a good thermal interface between your CPU and Heatsink is of critical importance, as is well known throughout the computing world. Many articles have been written on the theory of heat transfer and why you should lap or smooth out processors and heatsinks, so I won't be going into depth on the more esoteric points here. If you want to know the theory, there are many other resources on the web. This is going to be a hands-on explanation of how the actual lapping process works and the tips that I have found from experience work well for me.


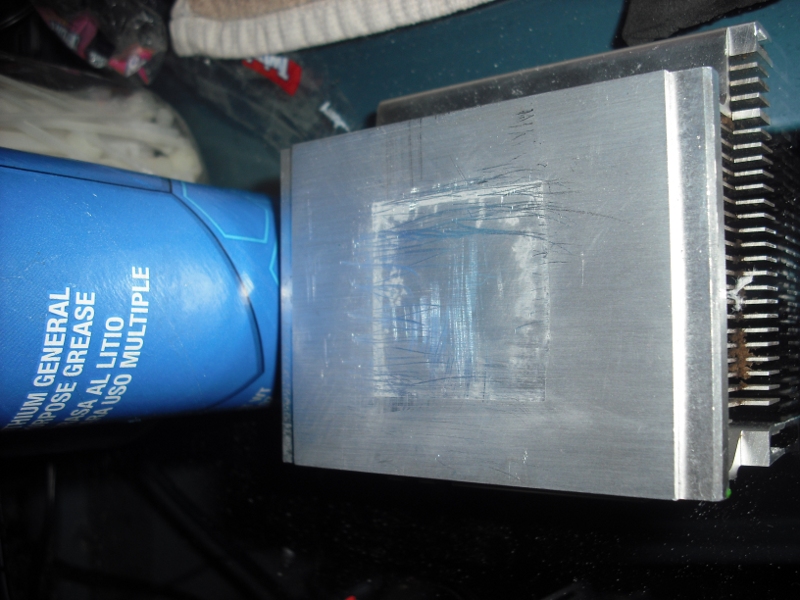
Here is a typical example of a heatsink after being removed from a computer and being cleaned. I normally use PrintKote Solvent to remove heatsink compound residue, but in this case I scraped the residue to replicate normal abuse. I have also removed the fan to prevent damage. Note the very low reflectivity of the metal, this means that the heatsink compound is having to fill in a large amount of surface area and that lowers thermal transfer efficiency.


The first step is to wet sand using a 400 - 500 grit paper. This creates a rough, hazy surface, but removes any gouges and scratches. This will also remove the milling marks, from when the heatsink was made. This is the foundation of all of the rest of the finishing work, and needs to be consistent. I find that moving the sand paper in small circles creates a fine grain hash pattern that is easy to remove in the next step.


Once you have a consistent fine grained circular hash pattern, move to wet sanding with a 1000 grit sand paper, this will remove most of the roughness from the work piece and will leave a smooth, almost reflective but somewhat hazy finish.


Now, here is where most instructions either end or become very vague. What I do at this step is add a small amount of polishing compound to the heatsink and them polish with a detail sander with Scotch-brite pad. You could also use anything with a fine liquid abrasive at this point, such as toothpaste, but it will be much slower. Hand polishing is also an option, but in my experience takes way too long.


If you have removed the fan assembly, you can now wash the heatsink in tap water and then allow to dry before re-assembly. You should be left with a highly reflective surface like the one below.


Next week, I will cover lapping the CPU.

Friday, October 8, 2010

Ajaxterm Setup Guide

I'm using Ajaxterm to access my Debian Lenny server command line remotely from places where I don't have the No Machine client installed. In it's default configuration, it would be great to use in a private network, but it is by no means secure enough to make Internet facing. Configuring SSL on Apache2 can be a real bear, but it is really worth the effort. The big advantage, in my mind, is that Ajaxterm can be configured to require SSL authentication with htpasswd and then it uses SSH authentication to get to the CLI. After fighting through the process for several days I was going to write the whole process up, but I found an article over at mewbies.com that lays out all of the steps and provides fixes for the known issues.

http://mewbies.com/how_to_install_ajaxterm_tutorial.htm

Time to start again...

Welcome to the KD5TKR TechBlog. After reading an article at networkworld.com(http://www.networkworld.com/news/2010/100510-facebook-unfriending-colorado.html), I've decided that it would probably be more efficacious for me to make most of my technical posts here. This will reduce the amount of posts that I make on Facebook, and will allow those who are interested in my technical posts to follow them here. It will also provide a more permanent and accessible record of my projects and exploits. Please feel free to bookmark the page, spread the word and stick around for all of the fun.