Saturday, November 27, 2010

Vintage Refrigerator Kegerator Conversion

In the process of getting ready for brewing a batch of beer, I've decided to set up a kegerator/keezer/fermentation chamber. My parents contributed a 5 cubic foot freezer and my father in law contributed a 50's vintage General Electric refrigerator. In the future, I will have articles on the conversion of both of these items, but for now here are some pictures of the GE refrigerator in the as found condition with a ball lock keg for scale.


Saturday, November 6, 2010

Polishing Corny Kegs

As promised, here is more information on how to polish stainless steel. Mostly the process is the same as for any polishing, but there is one gotcha, so read on to the end. When you pick up used corny kegs, they are usually dented, scuffed and covered in decals. I spoke a little last time about removing the decals, but there is always glue and gunk left behind. Last time I mentioned Goo Gone, but if the gunk is stubborn, I have found that mineral spirits or paint thinner will work too. Be careful with this because if you get it on the top and bottom rubber bumpers it may damage them, although careful, gentle rubbing with mineral spirits can remove black scuffs from red and blue upper bumpers. Here is a good example of what your used corny will probably look like when you get it.
 I started with an 80 grit SandBlaster pad from 3M, moving in a small circular motion and periodically checking the pad to make sure it wasn't clogged. I then moved to a 320 grit SandBlaster pad, following the same procedure I used with the 80 grit pad. Then I worked the entire stainless steel surface of the keg with 1000 grit wet/dry paper.  Keep the paper wet with just enough water to make the paper easy to move, this will soften the cut and keep the paper from clogging. At each step, make sure you work out the scratches made by the previous cut. You could also use opposing cuts at 90 degrees, since this will help you see when you have removed all of the scratches from the previous cut.
Once you have completed all of the above steps, wash the keg with water and then dry with a soft cloth. You should now have something that looks like the picture below.
If you wish to continue polishing to a mirror finish, you could now work the keg with a buffer and various rouges, but I like to leave it at an even, rough finish so that future scuffs and dings don't show as much. Now here is the gotcha, after stainless steel is polished at the factory, it is then passivated. Without passivation, the exposed iron atoms in the metal surface would begin to oxidize, and you would soon see rust discoloration in the metal. Passivation is normally carried out with any one of several strong acids. In our case we can use oxalic acid to passivate the stainless steel. My favorite source for oxalic acid is Bar Keeper's Friend. This household cleanser is available in many places, I purchased mine at Home Depot, but I understand it is also found in most stores that sell cleaning supplies. A word of warning regarding oxalic acid and Bar Keeper's Friend, beside being a corrosive, it can also cause kidney damage if you ingest, breathe or adsorb any of it. Please consider wearing protective equipment when you use this stuff. I use PVC forearm length gloves, safety glasses and a dust mask when I polish my kegs. If all goes well, you will end up with a clean, nice looking long lasting finish of which you can be proud. Here is a before and after shot for comparison.
That's it for now, but there will be more soon.

Friday, November 5, 2010

Keg cleaning and repair

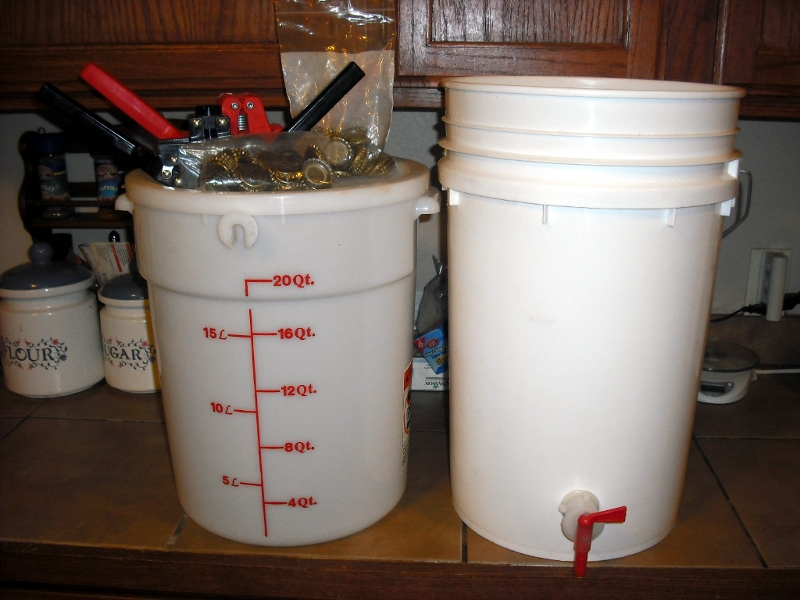
When you get used corny kegs, they are usually scratched, dented, filthy and quite often still partially full of soda. After emptying them out, rinsing them with hot water and drying them, the next step is to remove any labels, gunk and grime from them, so that the stainless can either be sanitized for use or even better, polished back to a mirror finish. I find that a razor blade, Goo Gone and Brasso work great to remove labels and gunk on the tanks. You may also need to use a scrubbing pad, such as a Scotchbrite, but keep in mind that this may scratch the stainless even further.

Some attention also needs to be paid to replacing the o-ring seal and any weak poppet or relief valves. The corny kegs design is quite simple, with gas in, liquid out, dip tube, pressure relief and tank access o-rings and/or valves. The gas and liquid valves does unscrew in the standard fashion, counter clockwise, but may be stubborn because of their original tightness and residual cola causing stickiness. If you have pin lock kegs, as I do, you should get a pin lock keg socket, which is a socket with slots cut into it for the locking pins on the connectors. If you are (brave, foolish, careful) you can remove them with a 9/16ths open end wrench and a small mallet. Be careful if you do this, because you don't want to damage the fittings (round off, break off locking pins, etc).
Once you get the fittings off, you can access the poppet valves, dip tubes and o-rings inside. Some corny kegs have straight dip tubes (Firestone, Spartanburg, Hoover Universal), and some have a curved liquid line dip tube(Cornelius). I have a mix of both. Be sure to keep the parts seperate and only work on one keg at a time, since some parts don't interchange.
 It also appears that some poppet valves are free floating and some are locked into place with tabs. Don't force the poppet valve out of the fitting if is it held into place with tabs, since you may break the valve. I believe there may be a tool for removing them properly, but I have not seen it yet.
When you reassemble the corny keg, you should use a good quality keg lube to keep the seals pliable, which will make the seal at a lower pressure. Next time, we'll hopefully take a closer look at polishing and cleaning the exterior of the kegs to make them look great.

Tuesday, November 2, 2010

Brewing and Kegging

I've decided to start brewing and kegging my own beer as a diversion from the computers and electronics in which I normally dabble. I have several friends involved in the homebrew scene, and it seemed like a natural hobby for me once I researched into it some more. Homebrewing is a nice combination of technology, science and art plus it seems like yet another thing I could do with very little expense.

For more information about homebrewing, I recommend the works of Charlie Papazian:

http://en.wikipedia.org/wiki/Charlie_Papazian

The first thing that I acquired was some old equipment that a friend of mine was throwing away. This included a bottling bucket, 20qt bucket, two cappers and some unused bottle caps.

Now at this point, most people would purchase a plastic or glass fermenter or two, some accessories, some supplies and then start brewing. I don't have any spare cash to be able to buy any of this, so I decided to macgyver most of my kit together and then worry about how to get the malt and hops later.

I started looking around town at thrift stores, army surplus shops, the recycle center and anywhere else I could think of. I called the beer distributors to inquire if they were getting rid of anything I could use. I asked both Coke and Pepsi delivery drivers if they knew of where I could find the old premix soda kegs. These are ideal for storing and dispensing beer and can also be used as fermenters and lagering tanks. Unfortunately none of the drivers knew of where I could find any. The idea occured to me, on Friday, to walk around the old Coke bottling plant and see if there were any kegs sitting around. I ended up getting chased out of the area by a crazy homeless person, but while driving past the delivery truck parking area, I spotted some cornelius kegs sitting in the back of the lot, inside a fenced in area. I decided to call the bottling plant in Abilene and see if I could have a few of them.
  After playing phone tag with personnel in both Abilene and San Angelo, I was able to get all 14 kegs and the promise of more if they find them for the low low price of $0.
After bringing the kegs home, venting them, dumping 50 gallons of stale pre-mix cola down the drain, and washing them, I have a nice assortment of stainless steel vessels. I will probably convert two for fermenting, use two for lagering, and use some for storing and dispensing beer. Some of my friends in town have asked about getting some of them for their brewing operations, so I hope to stubble across more soon.

Friday, October 15, 2010

Heatsink Lapping

Maintaining a good thermal interface between your CPU and Heatsink is of critical importance, as is well known throughout the computing world. Many articles have been written on the theory of heat transfer and why you should lap or smooth out processors and heatsinks, so I won't be going into depth on the more esoteric points here. If you want to know the theory, there are many other resources on the web. This is going to be a hands-on explanation of how the actual lapping process works and the tips that I have found from experience work well for me.


Here is a typical example of a heatsink after being removed from a computer and being cleaned. I normally use PrintKote Solvent to remove heatsink compound residue, but in this case I scraped the residue to replicate normal abuse. I have also removed the fan to prevent damage. Note the very low reflectivity of the metal, this means that the heatsink compound is having to fill in a large amount of surface area and that lowers thermal transfer efficiency.


The first step is to wet sand using a 400 - 500 grit paper. This creates a rough, hazy surface, but removes any gouges and scratches. This will also remove the milling marks, from when the heatsink was made. This is the foundation of all of the rest of the finishing work, and needs to be consistent. I find that moving the sand paper in small circles creates a fine grain hash pattern that is easy to remove in the next step.


Once you have a consistent fine grained circular hash pattern, move to wet sanding with a 1000 grit sand paper, this will remove most of the roughness from the work piece and will leave a smooth, almost reflective but somewhat hazy finish.


Now, here is where most instructions either end or become very vague. What I do at this step is add a small amount of polishing compound to the heatsink and them polish with a detail sander with Scotch-brite pad. You could also use anything with a fine liquid abrasive at this point, such as toothpaste, but it will be much slower. Hand polishing is also an option, but in my experience takes way too long.


If you have removed the fan assembly, you can now wash the heatsink in tap water and then allow to dry before re-assembly. You should be left with a highly reflective surface like the one below.


Next week, I will cover lapping the CPU.

Friday, October 8, 2010

Ajaxterm Setup Guide

I'm using Ajaxterm to access my Debian Lenny server command line remotely from places where I don't have the No Machine client installed. In it's default configuration, it would be great to use in a private network, but it is by no means secure enough to make Internet facing. Configuring SSL on Apache2 can be a real bear, but it is really worth the effort. The big advantage, in my mind, is that Ajaxterm can be configured to require SSL authentication with htpasswd and then it uses SSH authentication to get to the CLI. After fighting through the process for several days I was going to write the whole process up, but I found an article over at mewbies.com that lays out all of the steps and provides fixes for the known issues.

http://mewbies.com/how_to_install_ajaxterm_tutorial.htm

Time to start again...

Welcome to the KD5TKR TechBlog. After reading an article at networkworld.com(http://www.networkworld.com/news/2010/100510-facebook-unfriending-colorado.html), I've decided that it would probably be more efficacious for me to make most of my technical posts here. This will reduce the amount of posts that I make on Facebook, and will allow those who are interested in my technical posts to follow them here. It will also provide a more permanent and accessible record of my projects and exploits. Please feel free to bookmark the page, spread the word and stick around for all of the fun.